This weekend the R2 Builders group had a great presence at Maker Faire. The usual suspects from the Bay Area builders added a new droid made by Grant Mckinney and were joined by Guy Vardaman, Chris Ellerby from SoCal.
On Saturday our members were interviewed for G4TV's Attack of the Show, and for Wired Magazine. There was also a photo shoot for Make Magazine's upcoming robot issue.
Here is the Wired Interview.
Chris has a lot of pics on Flickr.
Tuesday, June 2, 2009
Saturday, March 28, 2009
Afternoon at the Ranch
Yesterday afternoon Gerard and I took his R2 up to the Ranch where the Clone Wars cartoon is created. Dave Filoni was being given honors from his Alma Mater via video conference and wanted to add a little Star Wars magic to his acceptance speech.
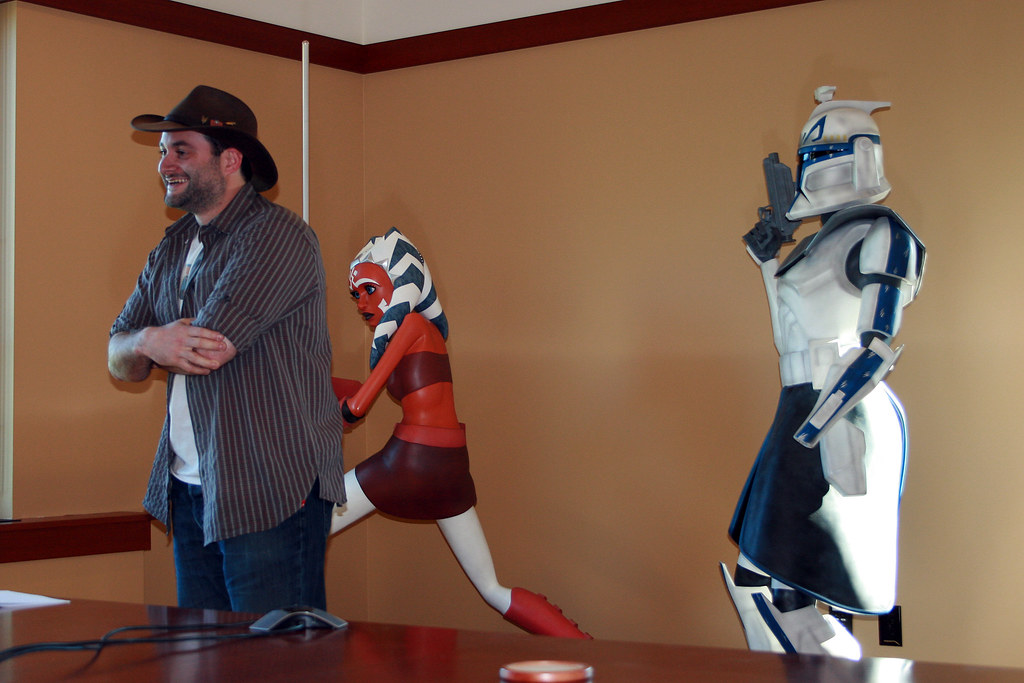
The site was beautiful with a large lake and rolling hills. The interior walls were decorated with George's classic movie poster collection and original art from the star wars universe. It was an amazing place to visit and seemed more of a mountain vacation spot than an office.
While we were there, Dave also decided to use R2 to announce the season finale ratings in the Friday staff meeting. We stashed the droid behind a curtain until Dave went up to make his presentation. R2 drove out and surprised everyone, had some dialogue with Dave which he announced to the group. Clone Wars beat out Battle Star Galactica by a wide margin which means that it also beat everything else on TV that night.
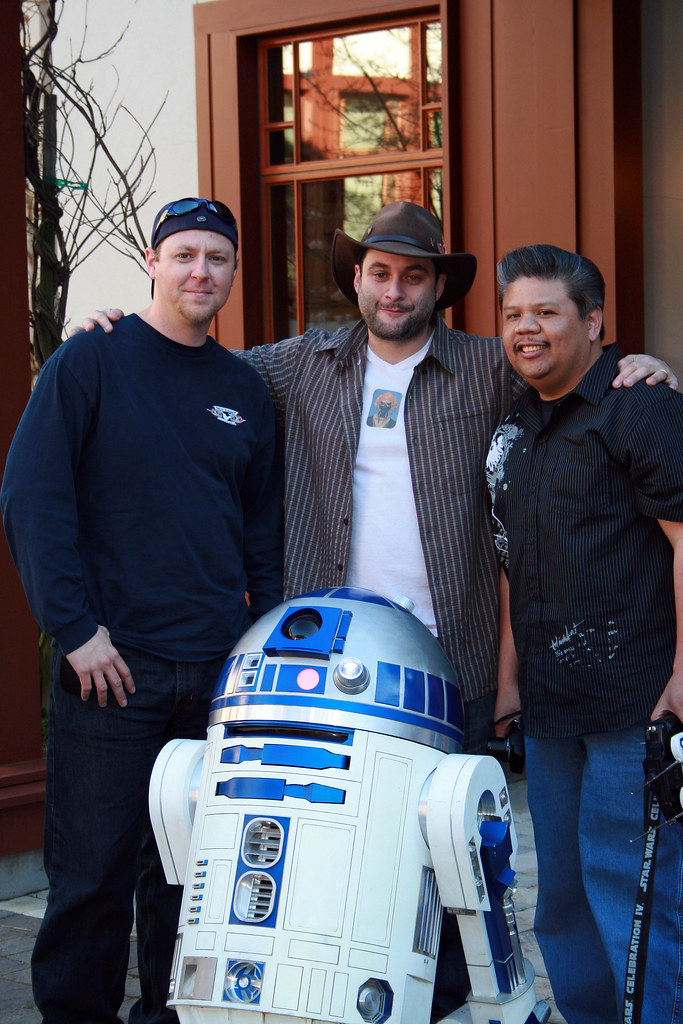
When all of the events were done, we went down to the building entrance and had a photo op with the show's production crew.
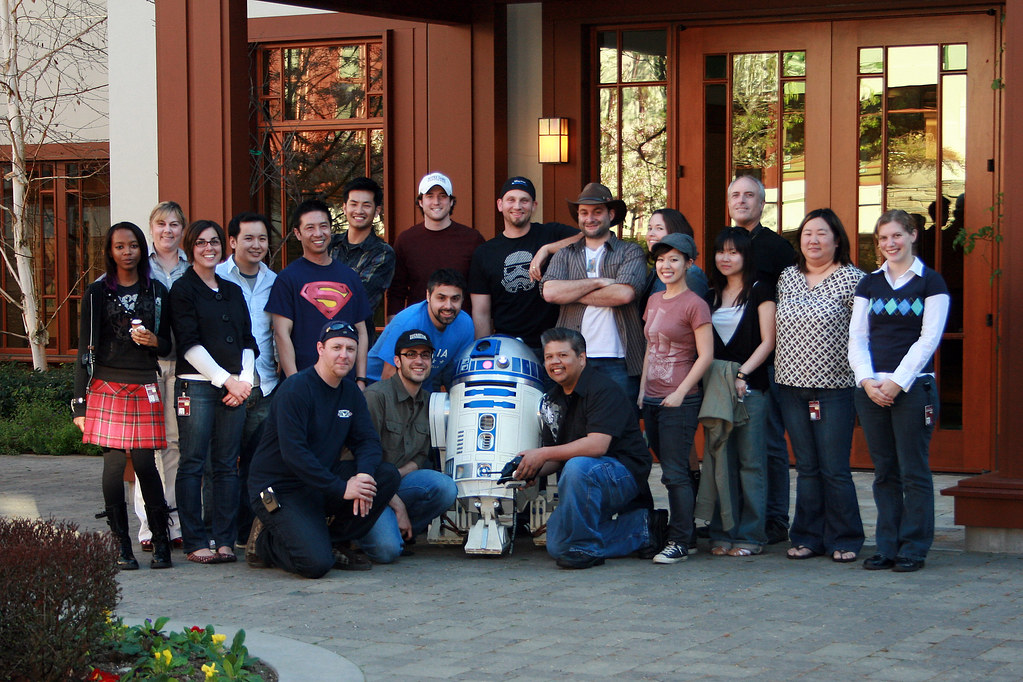
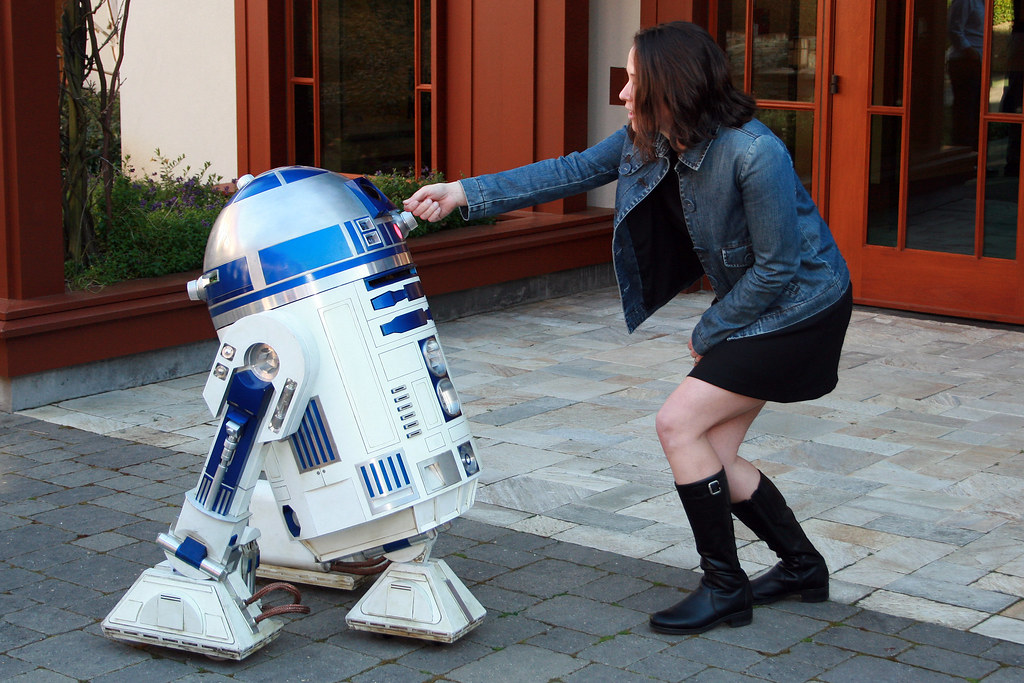
Naturally R2 got lots of love while he was there.
Big thanks to Megan for taking care of us while we were on site and thanks to Dave Filoni and the team for being a very laid back welcoming group.
Additional pictures can be found on my flickr page.
The site was beautiful with a large lake and rolling hills. The interior walls were decorated with George's classic movie poster collection and original art from the star wars universe. It was an amazing place to visit and seemed more of a mountain vacation spot than an office.
While we were there, Dave also decided to use R2 to announce the season finale ratings in the Friday staff meeting. We stashed the droid behind a curtain until Dave went up to make his presentation. R2 drove out and surprised everyone, had some dialogue with Dave which he announced to the group. Clone Wars beat out Battle Star Galactica by a wide margin which means that it also beat everything else on TV that night.
When all of the events were done, we went down to the building entrance and had a photo op with the show's production crew.
Naturally R2 got lots of love while he was there.
Big thanks to Megan for taking care of us while we were on site and thanks to Dave Filoni and the team for being a very laid back welcoming group.
Additional pictures can be found on my flickr page.
Wednesday, March 18, 2009
Friday, March 13, 2009
Rear Logic Soldering
I have begun soldering my own Rear Logics primarily to keep costs down, but its pretty hectic trying to emulate the 8 circuits on a project board.
Here is a pic of the first 5 rows soldered in place.

Here is a pic of whats going on on the reverse side.

The crossing and soldering of these wires to create the circuits has become a nightmare. Every row I complete leaves a greater mass of wires that end up covering leads where other wires need to be soldered.
When I started I was under no illusion about how difficult this could be, but I'm concerned that I will get done or half way done only to find that there was something else/better that I should have been doing. I really don't want to get to the end to find out that they don't work.
If anyone out there has any advice on how to do this better please let me know. I'm very interested in lessons learned by someone else who has been down this road.
*EDIT* Since the posting of this entry several people have given me help on sorting this mess out. I have since removed the wiring and started over. More to come in future posts. */EDIT*
Thursday, March 5, 2009
Rear Logics
Now that WonderCon is behind us, its time to set new goals and press forward with new things.
Previously all the goals were set based giving XS basic functionality. Now I'm back to figuring out what I can accomplish that will show the most change with the least amount of money.
I decided to start by wiring my own logics using Leon's layouts on project boards, but not without a few snags.
I started by trying to match a project board up to my logis to see if everything would fit. After looking a this pic on Chris James blog: Rear Logic Electronics it was apparent to me that the board had to be twisted 45deg to fit. So I gave it a shot and my board came up 6mm too wide, leaving 2 LED's off of each row.
Maybe someone out there can help me out with this, but I don't know if the problem is with the hole spacing on my board or if the rear logic surround needs to be filed out 6mm. Do project boards come with different hole spacing? I sure don't want to file down Dave Shaw's fine work on the surrounds. Actually if it comes to that, then I'll just go with rows of 4x25 rather than being screen accurate.
WonderCon 2009
WonderCon this year was a blast! Friday afternoon Chris and I went to get our pro badges for the team and looked around the hall a bit. After we had seen everything we wanted to, we headed over to the 501st/Rebel Legion Dinner.
The dinner was well attended with people from LFL, especially staff of the Clone Wars series. Mary Franklin and Steve Sansweet were among the crew as well as Dave Filoni, Matt Wood and Daniel Logan.
On Saturday we showed up at 8:00 so that we could get the droids unloaded but were turned away at the curb. Chris and I unloaded across the street while Tiny (from AZ) and Gerard went to the parking garage and drove their droids over.
The morning went well entertaining the crowds. We were asked a few times to move further from the entrance because the flow of traffic stopped when they saw our droids.
Our Droid Building Basics panel with Don Bies was at 12:30 and went far better than I had imagined. The room was packed and a lot of people turned away because they couldn't even see in. The whole session was lively and had some great questions as well as some humor to keep us from geeking out too completely.

Bonnie Burton from StarWars Blog and Terri Hodges were around on Friday and Saturday enjoying the con and taking pictures. We spent some time talking and they gave the droids some love.

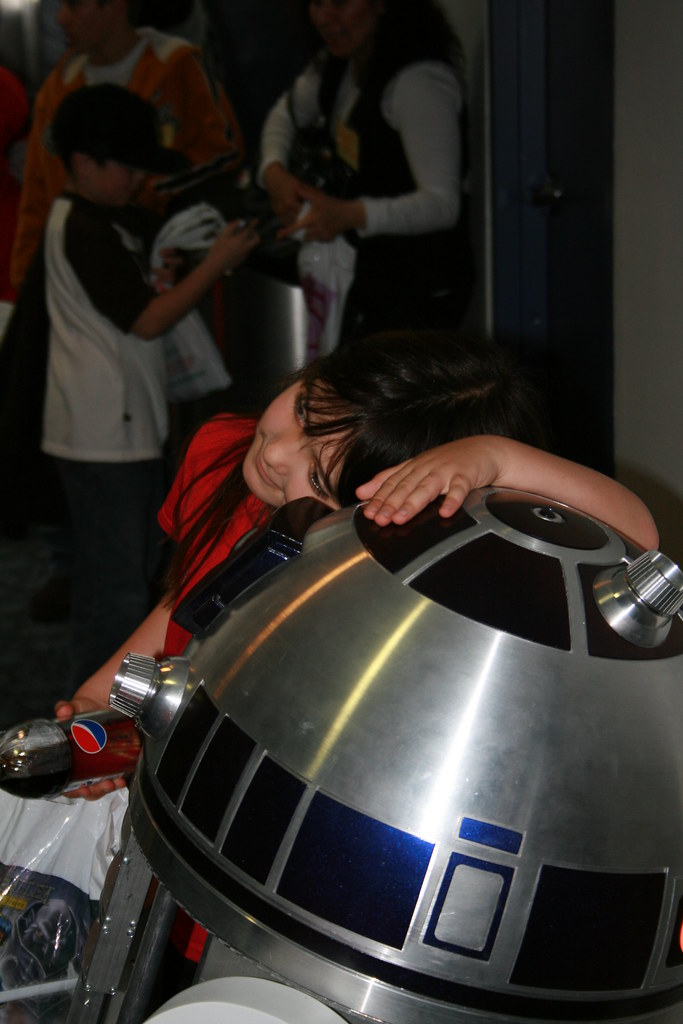
Of course XS was a hit with kids and adults alike, but I especially love pics like this one below.
Throughout the day there were quite a few interviews for the droids. The pic below was a crew from a Canadian TV station, but we were also featured on G4 TV and had numerous write ups, in the SF Chronicle, 1up.com and KPBS. There are even a few MySpace and YouTube Videos.
KBPS.org Article
Quick Quote in the Chronicle
1up.com Blog
MySpace Video
Edit: Official Star Wars Blog
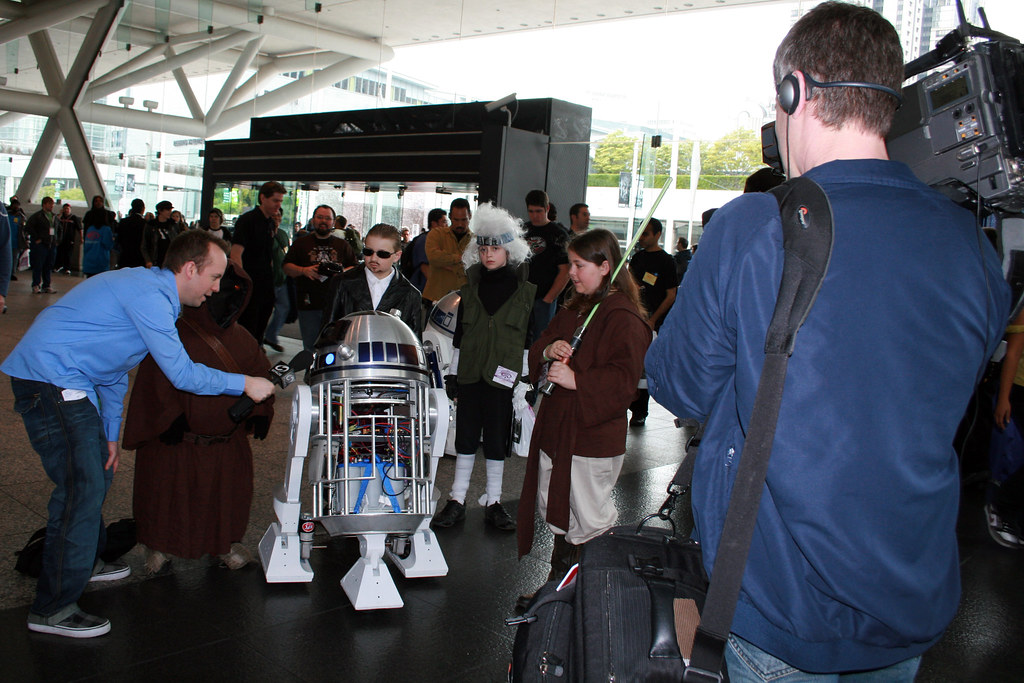
Of course the day wouldn't have been the same without my Padawan (shown in the interview pic) and my Jawa who worked hard the week before the con to get their costumes together.
They added some nice atmosphere to the droids and with the help of XS won the LFL costume award at the masquerade.

On a technical note, XS did a 14 hour day on the Optima Battery without a recharge. He took two 20 min breaks to recharge the Zune which gave us an initial 7 hrs and I replaced the RC battery when it started complaining loudly at the 12 hour mark.
Special thanks for a great day go out to Chris James, Tiny, Gerard and Don Bies.
Now get ready for Maker Faire SF!
More Pics can be found on my FLickr Page as well as Chris James' and the Star Wars Blog's.
The dinner was well attended with people from LFL, especially staff of the Clone Wars series. Mary Franklin and Steve Sansweet were among the crew as well as Dave Filoni, Matt Wood and Daniel Logan.
On Saturday we showed up at 8:00 so that we could get the droids unloaded but were turned away at the curb. Chris and I unloaded across the street while Tiny (from AZ) and Gerard went to the parking garage and drove their droids over.
The morning went well entertaining the crowds. We were asked a few times to move further from the entrance because the flow of traffic stopped when they saw our droids.
Our Droid Building Basics panel with Don Bies was at 12:30 and went far better than I had imagined. The room was packed and a lot of people turned away because they couldn't even see in. The whole session was lively and had some great questions as well as some humor to keep us from geeking out too completely.

Bonnie Burton from StarWars Blog and Terri Hodges were around on Friday and Saturday enjoying the con and taking pictures. We spent some time talking and they gave the droids some love.

Of course XS was a hit with kids and adults alike, but I especially love pics like this one below.
Throughout the day there were quite a few interviews for the droids. The pic below was a crew from a Canadian TV station, but we were also featured on G4 TV and had numerous write ups, in the SF Chronicle, 1up.com and KPBS. There are even a few MySpace and YouTube Videos.
KBPS.org Article
Quick Quote in the Chronicle
1up.com Blog
MySpace Video
Edit: Official Star Wars Blog
Of course the day wouldn't have been the same without my Padawan (shown in the interview pic) and my Jawa who worked hard the week before the con to get their costumes together.
They added some nice atmosphere to the droids and with the help of XS won the LFL costume award at the masquerade.
On a technical note, XS did a 14 hour day on the Optima Battery without a recharge. He took two 20 min breaks to recharge the Zune which gave us an initial 7 hrs and I replaced the RC battery when it started complaining loudly at the 12 hour mark.
Special thanks for a great day go out to Chris James, Tiny, Gerard and Don Bies.
Now get ready for Maker Faire SF!
More Pics can be found on my FLickr Page as well as Chris James' and the Star Wars Blog's.
Friday, February 27, 2009
Last Test Drive
Today R2-XS was tested by taking a trip to 4th Grade Science Class. The kids loved him and he performed extremely well on the door jams and carpet in the school entry.
Afterward Chris and I did some last minute tuning. Chris took this video before he was loaded into the van for WonderCon.
Hopefully the next post will be about how awesome he performed at the convention.
Until then, I have work to do on my friend's Jawa costume, so that he can accompany us on Saturday.
Monday, February 23, 2009
Caster Cleaning
My other item for today's work was to degrease and clean the bearings in my casters and grease them up again. After the first day out they had been dragging and sticking.
I soaked the casters in an inch of Simple Green. After 20 min the tub had a layer of silt and chunks in the bottom. After drying everything off I put fresh grease back in and figured I was done.
Once I had everything assembled again I noticed that things didn't go back exactly the way they came out. My rear caster was now rubbing the sides in two spots. I had to take everything out again and deepen the cuts in the foot shell before calling the job done.
Thankfully XS is now turning smooth.
Optima Battery Mounting
Today I set out to mount the Optima Blue Top battery in XS. My current wiring is designed to use 2 batteries, one for the electronics and the other for the foot motors. The primary reason was that the AX3500 Speed Controller cuts the foot motors if the battery drops below 10V causing the droid to jitter across the floor. By having its own battery it never knows when the primary battery is low so things stay smooth.
Of course all of that changes when you go to one large battery. The Optima should give me 8hrs or so of drive time without getting the jitters. Either way there is no room to put another battery.
So my goal was to make my system able to handle both my 18ah batteries and the Optima with the least amount of work if switching on the fly.
First thing I did was remove the plugs I had installed on my other batteries and wired screwed them together with the post from the big battery. I also wrapped the joint in electrical tape to prevent any potential disasters.

Next I removed my battery harness and strapped the Optima in with cargo straps. I put the hooks around the spacers holding the skirt on and criss-crossed them over the battery.

Once that was done I was able to put the post connections back on and plug both systems into the battery at the same time. With that done XS was running smooth. The battery slowed him down a little but not too bad.

As for making it an easy transition to the other batteries, I think I failed. If I start a day with the Optima in place, I can transition to the other batteries, but it would take about 10 minutes of screwing in the battery harness and putting the terminal plugs back.
Thursday, February 19, 2009
Recycled Bits
I thought it would be fun to catalog all of the random items that I have "recycled" from other places to create cheap or quick solutions for R2. Below is the current list of odd items.
Clear plastic, Washington Apples carton from CostCo, painted up becomes a nicely shaped Radar Eye. Unfortunately, if poked too hard its done for.

Milk jug cut and layered to make PSI lenses. Mike Velcheck's PSI's are so bright that I have 2 layers of milk jug hot glued together for one lense, and a third layer further up in the PVC tube.

I needed a quick, temporary fix for my lack of Logic LED's. These are a temporary WIP, made from Light Saber packaging. I have blue for the front.

My Zune dock need to connect to the amp via its Audio/Video cable, so I desoldered this one from a cable box.

The USB port, Headphone Jack and Speakers below were taken from an old PC, along with a number of connectors for various uses.


Last but not least, I needed something to keep the slip ring wires from falling into the dome drive motor. A quick scan of the garage revealed a slip 'n slide that my daughter had recently destroyed. I took the liberty of relieving it of this tube, which has done the job well.

Shaky Legs
One of the problems that I ran into during my test outing Tuesday was that the legs had worked loose and would fold forward during acceleration causing the wheels to slip or the front casters to bind up.
I tried to tighten the bolts by hand to no avail. I took advice given and put a hex like tip in a ratchet, which I quickly broke (leaving about 1.5" of broken tool down in the leg).
I found myself wishing I had an aluminum plate to make some sort of bracket, but since that wasn't an option, I resorted to more creative means.
I reached for the trusty cutting board used for the foot wedges and created inserts for the inside of the frame where the 2-3-2 motion would be (pictured below).

With the cutting board inserts in place, there is very little play in the legs and now R2 does a little wheely when he accelerates fast.
Wednesday, February 18, 2009
Fresh Batteries
After the game yesterday, when R2 was limping to the car one of the Dads told me he had a battery that came with his trailer that he didn't need and he offered it to me. He said it was a blue top and that it was 55Ah.
I wasn't sure if he was really serious, but tonight he brought it and dropped it off.
Its an Optima 8016-103 D34M BlueTop Dual Purpose Battery which retails around $200.

With a battery like this I should be able to drive R2 all day without a recharge. The only catch is that it weighs 43lbs and its larger than the ankle base plate in some dimensions. To use it I will have to remove my battery harness and come up with some other way to secure this thing.
Ironically, the long lost batteries that Chris and I ordered on line, showed up last night too. At least I wont have to order a second set.
Tuesday, February 17, 2009
1st Outing
Today XS made his way to our grade school campus for a test on carpet, then to the High School for a few hours before heading to the Girls B-Ball playoffs.
The carpet was a little too thick and killed his batteries fast so as soon as I got him to the high school I started charging him in the hall.

Everyone enjoyed seeing him and there were lots of pics taken. Even the teachers were ok with the loud interruption.


We got him charged and loaded in time to make the game, which our team won. I think it was because R2 was there to cheer for them. I did find myself wishing he made a sound something like, "What are you BLIND, REF?"

In the end R2 got his pic with the victorious Lady Falcons.
edit: I had some issues with my center foot. Now that its been used and loosened up, I need to at some wedges to keep it from tipping when I turn or accelerate.
Monday, February 16, 2009
R2-XS v1.0 Complete
With 1 Week and 3 Days left to go before WonderCon XS has reached the goal of being ready. This is just version 1.0 and he has a little tweaking that has to be done to the speed controller settings, but there is nothing left to construct or add for this version.
My kids squealed with delight, jumped up and down and even hugged him. Their response was better than Christmas morning.

Tomorrow I will attempt taking him to the school for some road tests. If it works out, I will get some pics to post.
Peace.
My kids squealed with delight, jumped up and down and even hugged him. Their response was better than Christmas morning.

Tomorrow I will attempt taking him to the school for some road tests. If it works out, I will get some pics to post.
Peace.
Sound System
Getting ready for WonderCon I needed sound in XS. Since I couldnt afford a CF III Reader yet, I went the cheaper route. I spent a few $ on a single channel amp and wired it to my Zune.
I'm using the Zune Dock v1.0 which is powered with a USB cord and has an audio/video output cable on it.
In the picture below you can see the USB plugged in to a 5v adapter that I soldered on a project board. The Zune is placed in the dock which is then connected to the audio/video input that I pillaged from an old cable box.
The Audio/Video input is connected to the 20W amp through a connector taken out of an old PC.

There are no speakers in the picture, but they are mounted in the droid. I had 2 HP speakers from an old PC. They ran off of a headphone jack, so I pillaged a headphone input from that same poor old PC and connected it via the same connector as the audio in.

Here you can see the Zune situated in the back of R2. All of the sounds I have are put into an Album and set to shuffle. The infrared remote from the dock is used to pause and play the random sounds.
Eventually, when I get the CF III system, I plan to put the Zune dock elsewhere in the droid with a mixer connecting the 2 systems. That way, all of the sounds can be played remotely through the CF reader and the Zune can be used to play music, simultaneously.
Saturday, February 14, 2009
Hello World.
Last night Chris came over and we worked together till 11:30 getting the electronics taken care of in XS. When he left we had the dome motor rotating and things were getting pretty close to done on the drive system.
Tonight I finished that wiring, chanced the AX3500 settings to mixed channels and then tested the system by laying the legs next to the frame and hooking them up. Since everything was in order, I mounted the legs and gave R2 his first spin around the garage.
I don't have video but here are a few pics.
His dome is mostly done, I have to tape on the pie panels since I wont have hinges installed for the convention. I also have to finish wiring the slip ring so that the PSI's will be working.

Here is the view of the back panel. I'm sure it looks familiar to many of you since I am using Chris' spare VEX until I can acquire my own.

I'd like to take this moment to thank Chris James for bringing me into this club and helping me along the way and Jerry Green (JAG) for being a huge help in getting may parts. If it wasn't for those guys I would just be a parts collector, and not a very good one at that.
Peace.
Monday, February 9, 2009
Casters and Plates for JAG Center Foot
Today I needed to finish my center foot. I had the foot with the plates and 3" casters, but I didn't have any hardware.
Since its important to get the casters set in as far as possible, I got creative with my hardware set up.
I purchased all the screws I needed as well as a set of long nuts that can be threaded into on either end.
Since the nuts couldn't be found to the perfect size, I used a pipe cutter and tubing to create spacers.


The end result was nice. The caster plate sat flush against the bracket.
Once that was finished I fit my casters and got everything mounted. Of course things weren't perfect. I had to cut a little more off of my Foot shell to allow the casters to turn properly.
In the end I had to take it all apart again so that I could prime everything. I'll post pics again when I have the finished product attached to the ankle.
First Blood
Last night I went to Chris' house to catch up after my vacation and to mount foot drives in my foot shells. We used his drill press to put the holes in the steel JAG feet that I have.
While cleaning up one of the holes I caught my finger on a burr and tore about a 3/4" long gash with a nice like deep spot at the end. Of course Chris was quick with a Pod Racer band aid for me, but not before I had bled on R2's white paint. Since this was the first time I had injured myself in the process of creating R2 I figured it was worth noting.

Beside bleeding on the paint, I did get something done. Both of my legs are now assembled, wired and tested electrically.

This is R2's geeky, weak in the knees pose.

Monday, January 26, 2009
Gifts from Above
Tonight so far I have added the panels to R2's dome and they are being left to dry.
I was also able to get the back electronics panel laid out with everything mounted to it.

My Mom recently saw R2 and got really excited about it. She has offered to help me purchase parts from time to time and she started telling her friends about the project. The R2 bug is contagious so her friends got excited which lead up to a call I got this afternoon.
Hailani called me and told me she had a garage full of recycles to donate since I have funded about a third of R2 from recycling. She also said that her garage was full of screws and electronics stuff that she was never able to sell after a good friend of hers was gone. She said that she figured it was sitting there just for such a day as this and it was God's blessing for my project.
She wasn't kidding! There were tool boxes full of machine screws all organized like I was at Ace Hardware. She also had electrical connectors and spools of wire just right for the job.
Below is the stuff that I took away with me, but there is more at her house if I ever need it.


New Lessons Learned and a little progress.
Saturday Chris came over with the plans to get my R2 wired and under the control of the Vex system.
We began by laying out my rear panel which did get the AX 3500 mounted on it by evening, but we ran in to quite a few snags along the way.

When the day was over, the only moving part completed was the dome drive system. Why didn't we get everything done? Because I had a lot of lessons to learn.
1st Lesson Learned - When you buy screws, don't just buy the amount required you will need extras eventually so get them in sets of 5 and 10 rather than 2 and 4.
When we got started Chris asked me for some screws, but I had only been buying the exact number needed, so we had to start a shopping list rather than starting work.
2nd Lesson Learned - Make sure you have all the required parts before you plan to get something done.
As it stands, I still need a Bus Bar for grounding everything and a fuse box to protect some of my electronics. So the shopping list got longer.
3rd Lesson Learned - When tapping a hole be gentle and don't push the tool, even if its just that last little bit.
"Its only a little bit further," I thought as I tapped a hole in my base plate. I was so close to being done with my battery holder and I rushed it. The result was that my cheap tap broke off in the hole, and I have NO IDEA how to get it out. I tried needle nose pliers but they just took more material off the tap.
Tonight I kept it simple and got a few extra things done. I was able to finish painting my ankles and got them mounted back onto the legs.
It should be interesting to see how things progress as we continue to count down to WonderCon.
Peace.
- Steve
Tuesday, January 13, 2009
Dome Top and Upper HP Mounting
Tonight I set out to tackle two problems. First was mounting my upper HP and second was looking for an alternative way to finish top exterior of my dome.
My 300mm dome originally came with a brass ring and a Volvo upholstery fastener to complete the top of the dome exterior. The brass clashed with the aluminum color of the other dome parts and the upholstery plug seemed to be a tough part to get painted and in place.
The solution was found in a trip to Ace Hardware with my dome in hand. I tried various bolts in the top of the dome to plug the hole and came away with the pin pictured below (it now has the top painted to match my panels).
By adding the appropriate pin to go with it, I also became the top fastener for my HP bracket made from ABS plastic.

Once I had the bracket placed with the pin, I drilled out a hole in the dome and used Chris James' "shoulder puller" to create a countersink dimple the same as on my other panels.
With the screw JB welded in place the bracket was tested out and seemed to work well. In the picture below there is a bit of a gap between the bracket and the HP due to there not being enough relief in one of the holes. Once I expanded the hole to allow a little play it fell into place.

Having completed that I just had to find a replacement for the brass ring. Ace didnt have any washers that fit the description, so I used the center tab that was on the outer dome when I got it. Originally, the tab was meant to be thrown away. It was scarred up from the lathe and was not punched exactly in the center.
My solution was to hold it with channel locks and drill it out with my largest bit and then expand the rest by hand with my Dremel tool.
Here is a pic of the final product with the HP, small ring and center plug (pin) in place. (Its not a bad shot of my color change paint either).

Monday, January 12, 2009
Dave Shaw's HP's
As the work on my dome nears completion, I wanted to take time to show off the HP's that I got from Dave Shaw in the fall.
It was interesting to get a pretty package with each part in its own little box with a silver Builders Logo on it, but the parts inside were definitely a work of art deserving of such a presentation.
The parts looked great and came with the clear cabochons already installed.

When broken down, the outer rings revealed that they had been lined with felt tabs for smoother rotation.
There was also an optional spacer ring added to help set the movement to "hand tight" or loose for servo movement.

The back plate was well put together and has the center punched with a dimple for later servo placement.

The best part was that when opened there was a lining tube that helped add reflection of the lights. The tube was needed because the entire inside of the HP was hollowed out. I dont have an exact weight comparison, but these HP's definitely qualify for the "Diet" Label.


I'm really pleased with the craftsmanship on these and I cant wait to be sporting them on my completed dome soon.
Subscribe to:
Posts (Atom)


